How to Install WordPress plugin: 3 Easy, Free & Simple Ways
~ Updated ~ January 30, 2025 ~
No matter if you are new to WordPress or already have some experience with the platform, at some point, you will most probably need to add extra features to your WordPress site.
I can not count how many times I installed WordPress plugins to the custom Showit, ProPhoto & WordPress websites I designed for my clients. Or, when I needed to add an additional feature to my Showit and ProPhoto WordPress templates I sell in the Flying Muse shop.
Luckily WordPress made it super easy to add that extra feature you need. All you need to do is to install WordPress plugin.
Table of Contents
- What is a WordPress plugin?
- What is the WordPress repository?
- What is the difference between free and premium WordPress plugins?
- How to install a WordPress plugin to your website
- Key Takeaway: Install WordPress plugin
What is a WordPress plugin?
A WordPress plugin is a set of code instructions coded in a specific way that provide an extra functionality to your WordPress site or blog.
Essentially, this means, a WordPress plugin is an add-on software that adds a new functionality to your WordPress site or extends an existing functionality on your website.
While a new and clean WordPress installation is a very powerful CMS software itself, most of the time users still need to add some extra features to their WordPress websites.
Luckily, many WordPress plugins are allowing you to add that extra special feature you are craving for.
And, on top of that, the process is extremely simple and easy by installing a WordPress plugin.
What is the WordPress repository?

The WordPress repository is a free hosting provided by the WordPress developers themselves. It is a dedicated place for WordPress plugin developers to host their plugin for free.
The WordPress repository was launched way back in 2005 and is not going away anytime sooner. If you’d like to learn more in-depth information on the WordPress repository you can read through the WordPress Repository launch announcement where they published some advanced technical details, too.
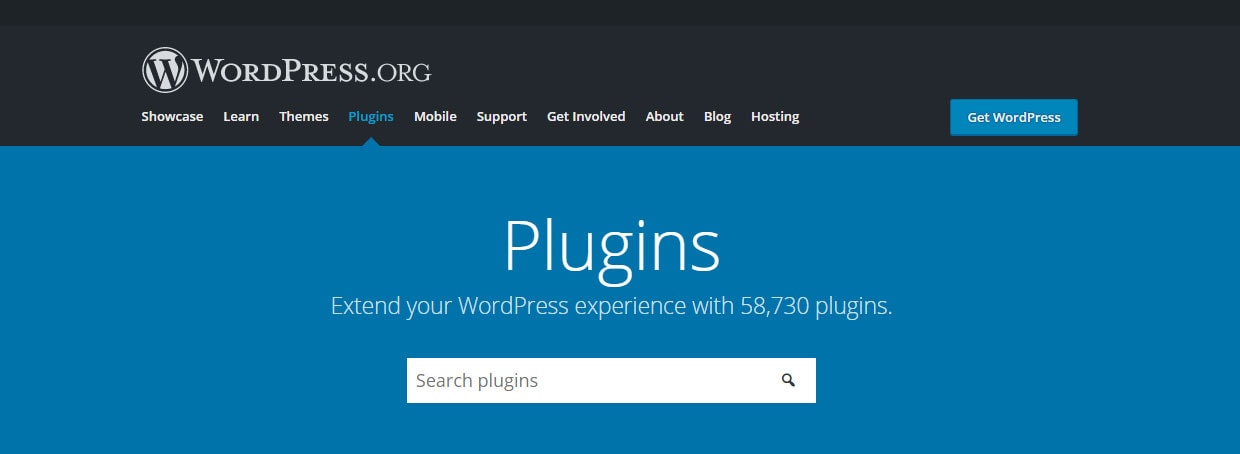
The WordPress repository works like a free library of WordPress plugins. Besides being available via an online web version the very same version is included with every WordPress installation.
The WordPress repository is extremely easy to use and an awesome place to search, find and install a WordPress plugin.
What is the difference between free and premium WordPress plugins?
The difference between free and premium WordPress plugins is just that. Some are absolutely free to install, configure and use. And, there are other, premium plugins. These WordPress plugins require either monthly, yearly, or a one-time fee to obtain, install and use on your WordPress-powered website.
How to install a WordPress plugin to your website
1 | Install WordPress plugin via your WordPress dashboard
Installing a WordPress plugin via your self-hosted WordPress dashboard is the easiest and the most intuitive way. WordPress made the process extremely easy. Especially since there are only a few steps you need to do.
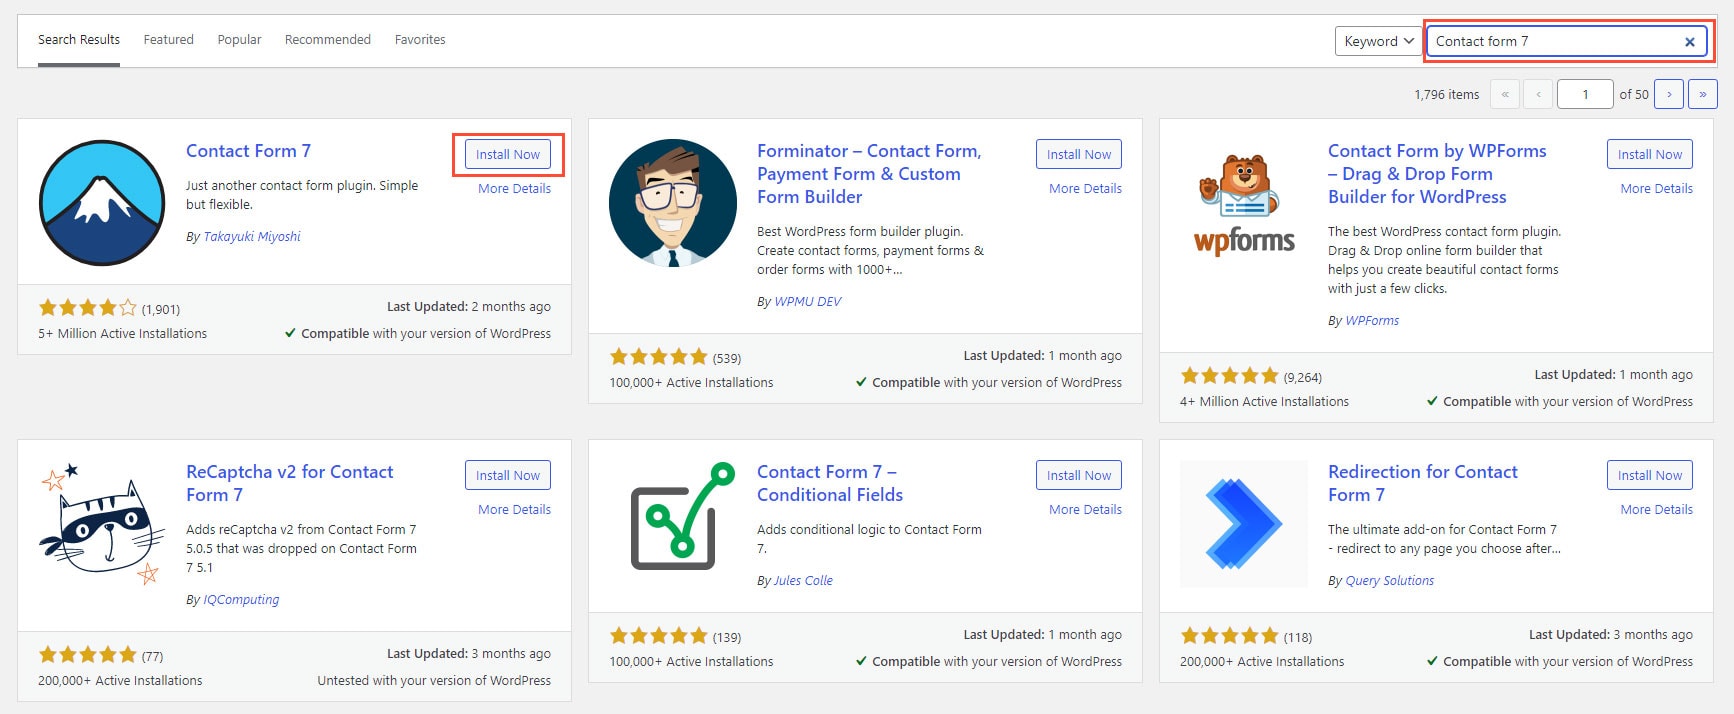
If you know the plugin name you can search for it via the WordPress dashboard and install it with a simple click of a button.
Since WordPress will display other options related to the plugin you were looking for you can look at any of the plugin specifics by clicking the More details button. There you will find all of the relevant information written by the developers themselves on how to use their plugin and the plugin features.
So, now that you know how and where to find a plugin you’d like to install into your WordPress website, let’s dive into the step-by-step process.
Step 1 | Login to your WordPress dashboard and navigate to Plugins > Add New

Step 2 | Search and find the plugin you’re looking for. Don’t forget – if you find a more suitable plugin for your needs you can always check the specifics by clicking the More details button.

Step 3 | Click Install and wait for the plugin to install.
Step 4 | Click Activate. And you’re done!
Step 5 | This step is optional and you can postpone it for when you will have the time to go into the plugin settings and configure all that is needed for the plugin to function. Just make sure you do not forget to do this. Without settings, a plugin only adds unnecessary load to your website without adding any value. And, you don’t want anything to slow down your website, don’t you?
PRO TIP: The very best practice is to never leave a plugin activated on your website that you’re not actively using. This removes clutter and helps your WordPress website to be as fast as possible.
2 | Install WordPress plugin from a zip file
Often and especially when you outgrew the free features built into the WordPress free plugins, you will need to upload and install a premium WordPress plugin or a plugin that is not listed on the WordPress repository. In such a case you can not simply search for and find the plugin via your WordPress dashboard to install and activate premium features.
While some developers include an option to activate premium features into their plugins by using an activation key, most of the time you will need to install the premium WordPress plugin from a zip file. It may feel intimidating at first especially if you’re doing this for the first time. But the process is pretty straightforward and extremely easy. And, you only need to remember a few things!
The most common mistake people make when they try installing a WordPress plugin from a zip file is to get the wrong format or the wrong file. If you upload a zip file that does not contain all and only the plugin files, WordPress will display an error, and this will result in your WordPress plugin not getting installed into your WordPress website.
Often than not some developers pack the plugin into a zip file together with the documentation, activation key information, or other files. Therefore, always make sure you have the appropriate files by accessing the zip file to check if there are any other files included.
If you’re doing this for the first time and you’re not sure how to check on this your best route is to lookup for the instructions on how to install that specific plugin in an instructions file, or help section on the developer website or wherever you had purchased or obtained the WordPress plugin.
When you are sure you do have the right WordPress plugin zip file, follow the below steps and you’ll install a WordPress plugin in only a few clicks.
Step 1 | Navigate inside your WordPress dashboard to Plugins > Add New
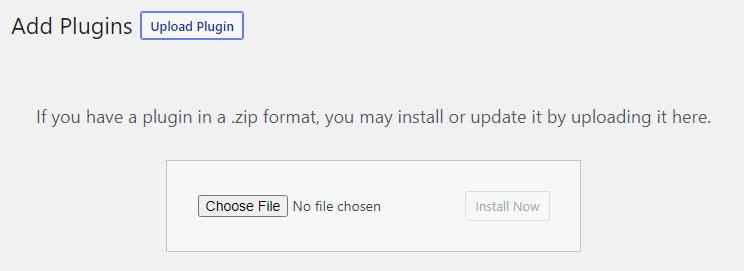
Step 2 | Click on the Upload Plugin button, locate the WordPress plugin zip file by clicking the Choose File button. When you have located the file just click on Install Now.

Step 3 | Click on the Activate button and you’re done!
Step 4 | Don’t forget to configure the newly installed WordPress plugin!
PRO TIP: I added some details on why configuring the plugin is so important in the previous section, so make sure to follow those instructions. Especially, if you’d love your WordPress website or a WordPress blog to be as fast as possible and not to add any code clutter, too!
3 | Install WordPress plugin manually
Sometimes the conventional way might not work for you. Maybe WordPress reported an error during the installation process, you happened to install the plugin at the exact time your hosting provider did maintenance on the server your website is hosted on, or there was a slight glitch with your internet connection. No matter the reason, the solution is simple – you will need to install a WordPress plugin manually.
I’ve included the 3 easiest ways on how to install a WordPress plugin manually below. There are other ways to do this, but those are specific to advanced users and I am concentrating on the easiest ways so anyone can do it by themselves – no matter the level of WordPress knowledge.
All of the 3 ways below have one thing in common – uploading a plugin to the specific WordPress plugin path essentially is the installation process. By doing so, the plugin will get installed & will appear in your dashboard. The only thing you’ll need to do is to activate and configure the plugin right after you have uploaded it to the WordPress plugin’s path.
Where to install a WordPress plugin manually
The most important thing to know about installing a WordPress plugin manually is the right path and the right way to do this.
The below 2 things are what you absolutely need to know to be able to install a WordPress plugin manually on your hosting:
- All plugins reside inside the ‘wp-content/plugins‘ path inside your WordPress installation.
- If you are uploading the files manually you will need to upload the unzipped plugin contents to this location. All of the files need to be uploaded to this location. And, the plugin you are installing should reside in a dedicated folder with the very same name as the folder inside the zip file.
No matter the chosen approach from below to install, the above rules apply.
Option 1 | Install WordPress plugin via FTP
One of the options to install a WordPress plugin manually is by using FTP. To be able to upload anything to your website hosting via FTP you will need to install and use an FTP client on your computer. There are many FTP clients out there, but most of the time people use FileZilla. I am old school and I prefer to use the FTP options in Total Commander.
If you would like to install a WordPress plugin via FTP you will need to get the specific settings on how to connect to your hosting server. Then you will need to insert all of the settings into the FTP client, to connect and be able to upload.
Honestly, this is not my preferred option for uploading a WordPress plugin manually, I prefer using cPanel or another file manager that the hosting company provides. Using an FTP client can sometimes be glitchy, and sometimes the connection may break to the server. That is one of the reasons why I avoid using FTP and use it when absolutely necessary (only when I do not have any other option).
Option 2 | Install WordPress Plugin without FTP
If you would like to Install a WordPress plugin without FTP the very next best option is to install the WordPress plugin via cPanel or any other file management panel your hosting company provides.
As features depend and are different from one hosting company to another I have included a tutorial on How to install WordPress plugin via cPanel below.
What if your hosting does not provide cPanel? The steps to upload a plugin should be fairly the same even in a case if your hosting provider doesn’t provide a cPanel hosting panel. Only the interface will be different but the steps are absolutely the same.
Option 3 | Install WordPress plugin via cPanel
If your hosting management panel is cPanel, it is absolutely easy to upload and install a plugin. The one feature I absolutely love about cPanel is that the File manager gives an option to not only upload files but upload the complete zip file and unzip the plugin files after the plugin zip file is uploaded to the server.
Step 1. Login to your hosting panel and launch File Manager via cPanel;
Step 2. Upload the plugin zip file into the wp-content/plugins/ folder;
Step 3. Unzip the plugin via File manager;
Step 4. [Optional] Go to the Installed Plugins inside your WordPress dashboard to activate and set the setting for your newly installed plugin;
Step 5. Delete the zip file from your ‘wp-contents/plugins’ folder via File manager. And, you are done!
Note: I love keeping WordPress clean, and especially when it comes to the installation folders or installed plugins. I absolutely recommend not skipping the above ‘Step 5’, even in case if you plan on configuring the plugin at any later point in time. One thing you should be aware of is – uploaded files that are not actively used on your hosting but do take space impact your hosting and website performance. And, who doesn’t want a fast as possible website, right?
Key Takeaway: Install WordPress plugin
Personally, I prefer using the dashboard’s search and upload feature for free plugins. For specific uploads, I prefer using the File Manager in cPanel or any other File manager available with the hosting server a website is hosted on. Sometimes I absolutely need to use FTP but I needed this approach on only a few occasions.
Managing WordPress plugins is also extremely easy to do – all you need to do is to activate, deactivate and/or delete a plugin from your WordPress dashboard with a single click. On some occasions, you may find that some plugins are not ‘friendly’ with some hosting providers or with your specific WordPress setup. If any plugin does not work as you expected you can log into your WordPress dashboard and deactivate or even delete the plugin.
Additionally, on some rare occasions, a plugin might break your website and you might not be able to deactivate the plugin from your WordPress dashboard. In such a case you can log into your hosting via cPanel or any other hosting file management software your hosting company provides or via FTP to delete the plugin.
Just keep in mind that not all plugins are not compatible with some WordPress versions and might cause problems.
save + share this post
~ About the Author ~

Sandra | the Flying Muse
Sandra is the founder and lead designer of the Flying Muse, a boutique artisan creative studio handcrafting timeless brands and websites for photographers and creative entrepreneurs.
